关于vpn
Note
正确使用vpn进行知识学习和科研!!!
1.安装
下载clash (提取码:7jcx)
cd ~/Downloads
unzip Clash.for.Windows-0.20.39-x64-linux.zip
# 进入下载目录并解压

mv Clash.for.Windows-0.20.39-x64-linux ~/CLASH  #/CLASH该文件为自建的
# 移动到自定义文件夹

cd ~/CLASH/Clash.for.Windows-0.20.39-x64-linux
./cfw
# 运行程序
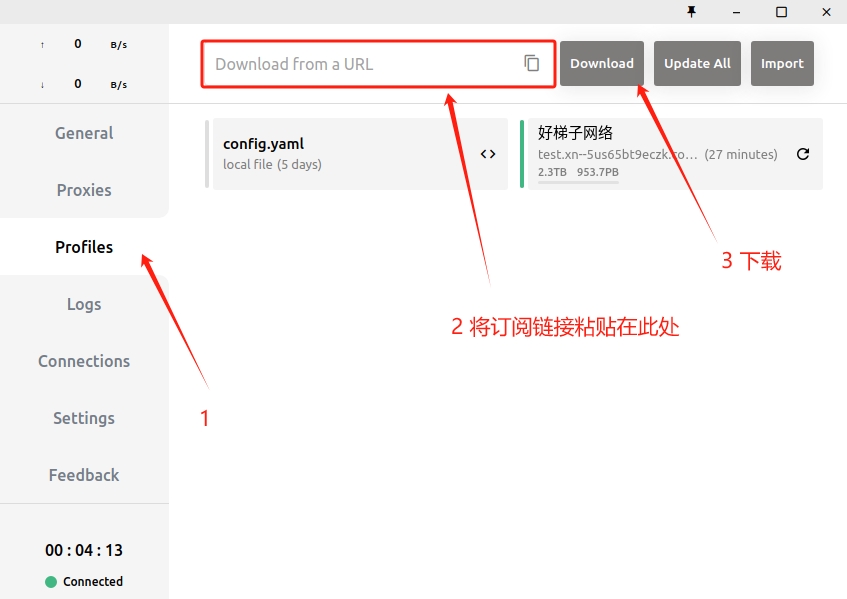
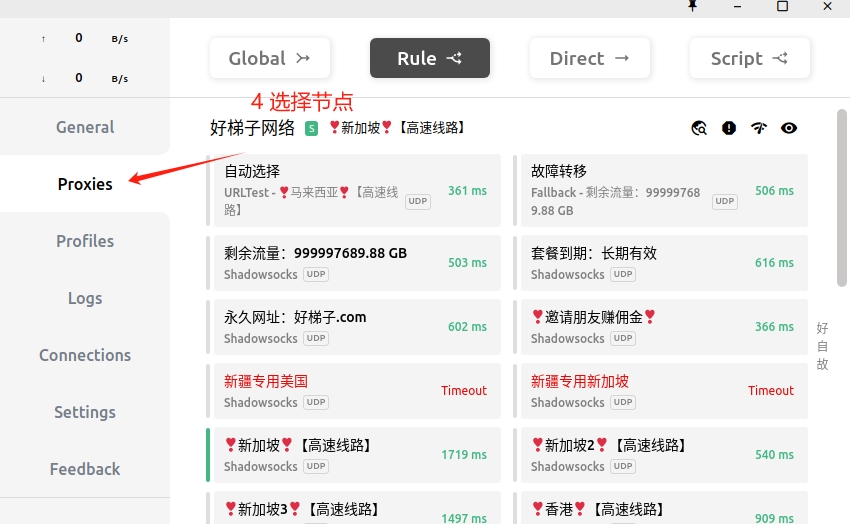
2.导入节点
购买节点 需要付费购买
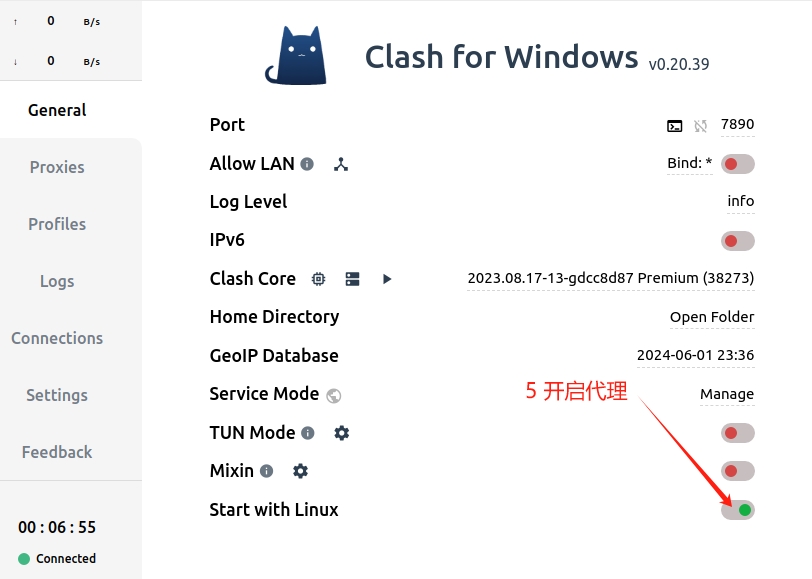
3.设置网络代理
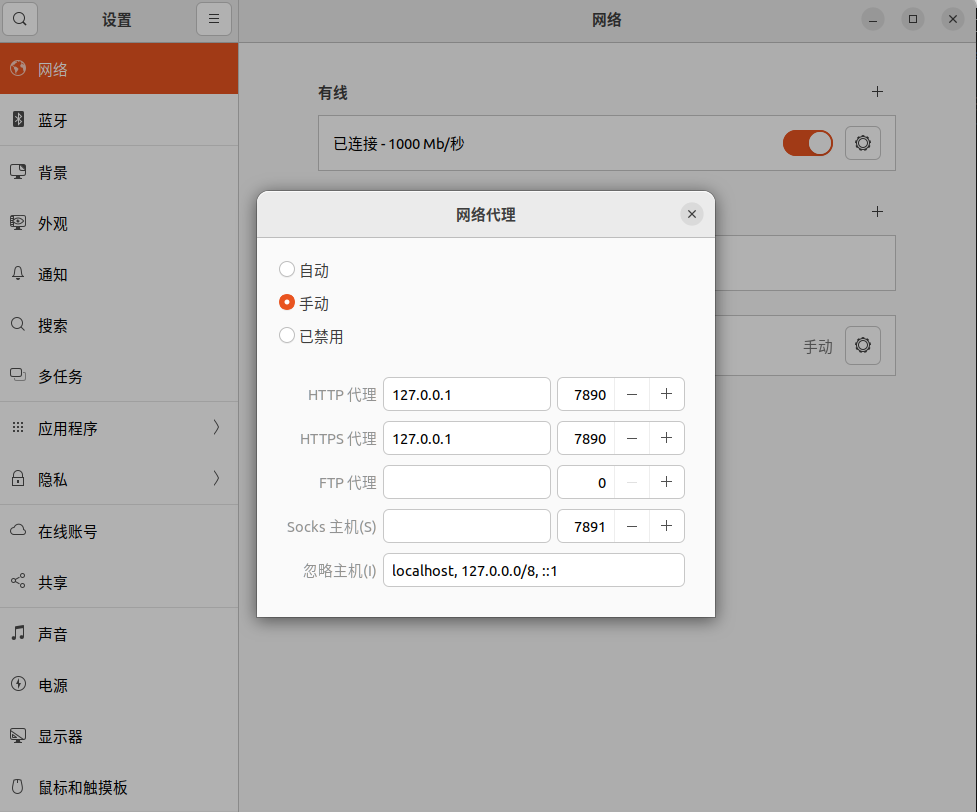
终端使用代理
echo '# Clash' >> ~/.bashrc
echo 'export http_proxy=http://127.0.0.1:7890' >> ~/.bashrc
echo 'export https_proxy=http://127.0.0.1:7890' >> ~/.bashrc
# 写入.bashrc
4.创建快捷方式
cd ~/.local/share/applications
touch clash.desktop
# 进入程序目录创建程序

sudo gedit clash.desktop
# 编辑clash.desktop文件
将以下内容粘贴到 clash.desktop 文件内, /home/xxx 为你的用户名!!
[Desktop Entry]
Name=clash for linux
Icon=/home/xxx/CLASH/Clash.for.Windows-0.20.39-x64-linux/resources/clash.png
Exec=/home/xxx/CLASH/Clash.for.Windows-0.20.39-x64-linux/cfw
Type=Application
添加权限
chmod a+x clash.desktop
5.配置自启动
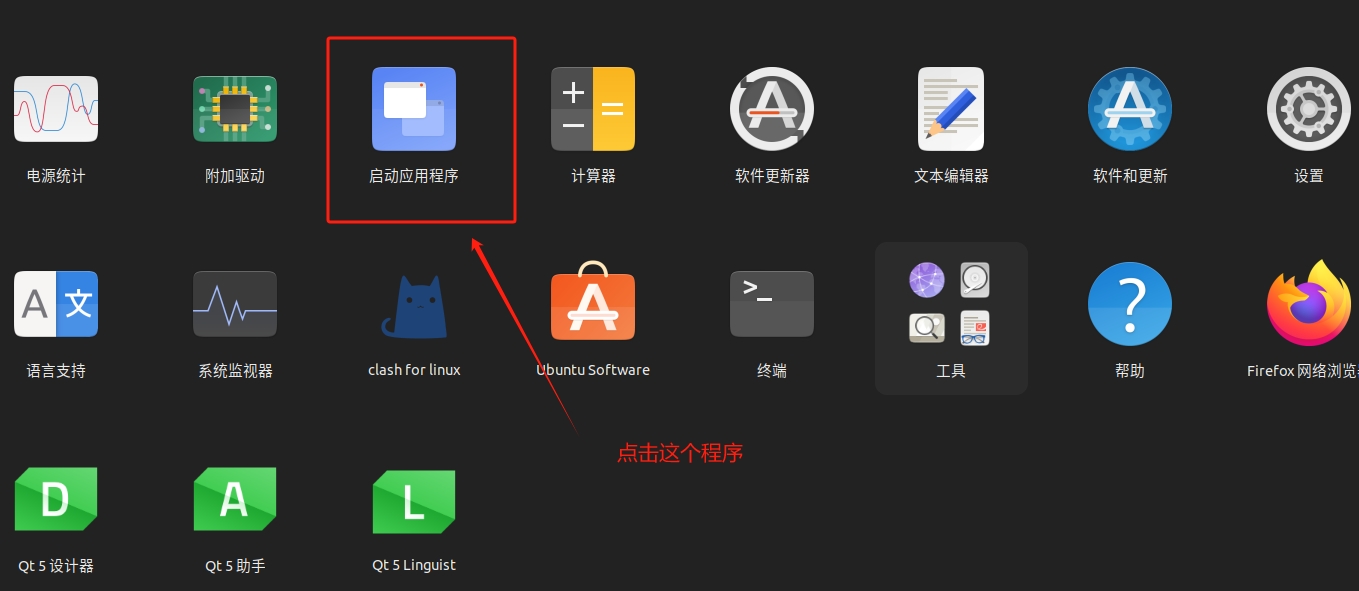
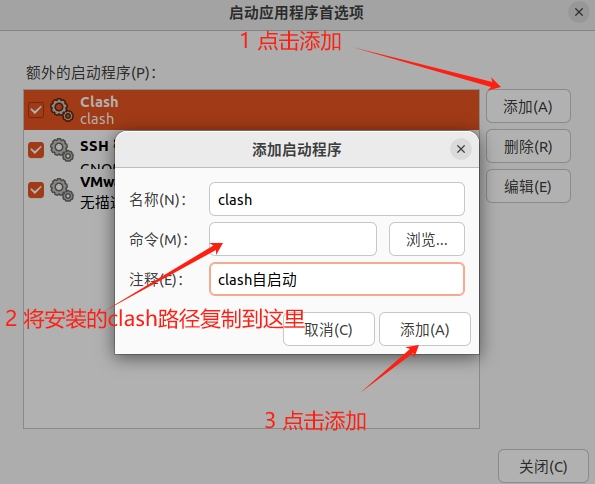
/home/shakima/CLASH/Clash.for.Windows-0.20.39-x64-linux/cfw
# 注意修改路径!!!